Door handles, typically ignored in the realm of home improvement, are vital components that use both performance and looks to a home. When a door handle malfunctions, it can interrupt day-to-day regimens and compromise security. Thankfully, door handle repair is a manageable job that can be approached with the right understanding and tools. This article serves as an extensive guide for repairing door handles, ensuring that every house owner can undertake the job with confidence and effectively.
Comprehending the Types of Door Handles
Before diving into the repair procedure, it's important to understand the kinds of door handles you may come across. Common types consist of:
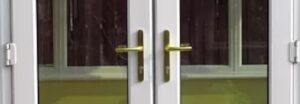
Lever Handles: These been available in different designs and are typically much easier to grip, making them ideal for heavy doors.
Knob Handles: Traditional in style, knobs can be more challenging to utilize, particularly for individuals with minimal grip strength.
Deadbolts: These provide extra security and might need a separate mechanism for locking.
Smart Handles: Equipped with electronic locking systems, these modern handles offer innovative security but typically need specific understanding for repairs.
Comprehending the particular kind of door handle is essential as it affects the approach of repair.
Common Door Handle Issues
Before delving into repairs, it's important to determine the most common issues that can arise with door handles:
Loose Handle: This often arises from screws that have actually loosened up over time due to routine use.
Sticking Mechanism: Handles might become sticky due to dirt build-up, rust, or wetness.
Broken Handle: This can occur from wear and tear or unexpected force.
Locking Issues: If the lock doesn't engage, it might indicate a positioning concern or internal mechanism failure.
Identifying the problem will help in picking the appropriate repair technique.
Tools Required for Door Handle Repair
Having the right tools is vital to ensure the repair process goes efficiently. Here's a list of basic tools you might need:
Screwdriver (flat-head and Phillips)
Allen wrench (for particular types of handles)
Replacement parts (screws, springs, or the whole handle set)
Lubricant (graphite spray or silicone-based)
Cleaning fabric
Drill (if brand-new holes are required)
Gathering these tools ahead of time will simplify your repair process.
Step-by-Step Guide to Door Handle Repair
Step 1: Remove the Handle
Determine the Screws: Often, handles are protected with visible screws. Get rid of these screws utilizing the suitable screwdriver.
Remove the Handle: Gently pull the handle away from the door. If there are internal parts, ensure you keep in mind how they mesh for reassembly.
Action 2: Inspect the Mechanism
Look for Wear and Tear: Look for broken parts, loose screws, or rust.
Assess the Latch: Ensure that the lock relocations easily. If it sticks, it may require cleansing or lubrication.
Action 3: Clean and Lubricate
Clean the Components: Use a wet fabric to wipe down the handle and any internal parts. If there's rust, a rust remover should be used.
Lube the Mechanism: Apply a little quantity of lubricant to the moving parts, guaranteeing no excess that might leak onto the door surface area.
Step 4: Repair or Replace Parts
Tighten up Screws: If screws have actually come loose, tighten them. If any are harmed, change them with appropriate sizes.
Replace Broken Parts: If any part of the handle is broken, you may need to purchase replacements or try to find a new handle set.
Step 5: Reassemble and Test
Reattach the Handle: Carefully align it back onto the door and secure it with screws. Guarantee you follow the original setup.
Test the Functionality: Before closing the door, check that the handle turns efficiently and the latch engages effectively.
When to Seek Professional Help
While numerous door handle issues can be resolved with a little DIY effort, some problems might require a professional's touch. Think about looking for professional help if:
The handle becomes part of an intricate locking mechanism.
Replacement parts are tough to source.
There are electrical elements included (when it comes to clever handles).
Frequently Asked Questions About Door Handle Repair
Q1: How typically should I maintain my door handles?
A: It is advised to check your door handles a minimum of when a year. Routine cleaning and lubrication can extend their life and reduce the possibility of needing repairs.
Q2: Can I change a door handle myself?
A: Yes, changing a door handle is a DIY task that many house owners undertake effectively. As long as you have the right tools and follow the appropriate steps, it ought to be manageable.
Q3: What kind of lubricant is best for door handles?
A: A silicone-based lube or graphite spray is best suited for door handles as it will not attract dust and dirt like oil-based lubricants.
Q4: How do I understand if my Quality Door Handle Repair handle requirements replacing or simply a repair?
A: If the handle is heavily used, rusted, or if multiple parts are broken and can not be repaired, replacement might be the more useful and economical service.
Q5: What should I consider when purchasing a new door handle?
A: Consider the style, security functions, compatibility with your existing doors, and the material. Guarantee it fits with your home's aesthetics and meets your functional requirements.
Repairing a door handle is a simple process that can be achieved with a little perseverance and the right tools. Familiarity with the kind of handle and common issues ensures that property owners can deal with most repairs confidently. By following this guide, individuals can maintain and improve the functionality and look of their doors, making sure both availability and security throughout their home. With routine maintenance, door handles can continue to serve their purpose efficiently, adding worth and comfort in your home.